Dropdown Menu Pro 2.0 Guide
Make a one-time purchase for lifetime access to the dropdown menu code.

Improvements from v2.0
A more elegant way to generate dropdown menu items. You only need to add - for nested menu items to make it work! There is no need for the child text anymore. It’s not only more elegant, but also more friendly for search crawlers.
How to install
After completing your purchase, you can download a file containing the dropdown menu code.
The code in the file is divided into two parts, the first part starts with <!-- Dropdown Menu Style -->, and the second part starts with <!-- Dropdown Menu JS -->.
Add the first part to the 'Site header'
Navigate to Settings > Advanced > Code injection > Site header, copy and paste the first part of the code to the "Site header".
Here is an example of what the first part looks like:
<!-- Dropdown Menu Style -->
<link rel="stylesheet" ...>
Add the second part to the 'Site footer'
Navigate to Settings > Advanced > Code injection > Site footer, copy and paste the code the second part to the "Site footer".
Here is an example of what the second part looks like:
<!-- Dropdown Menu JS -->
<script ...></script>
Add A Dropdown Menu in 'Navigation'
To add a dropdown menu, you only need to mark nested (child) menu items with a dash -:
- Navigate to Settings > Site > Navigation
- Change the parent menu item link to
# - Mark nested menu items with a dash
-at the beginning.
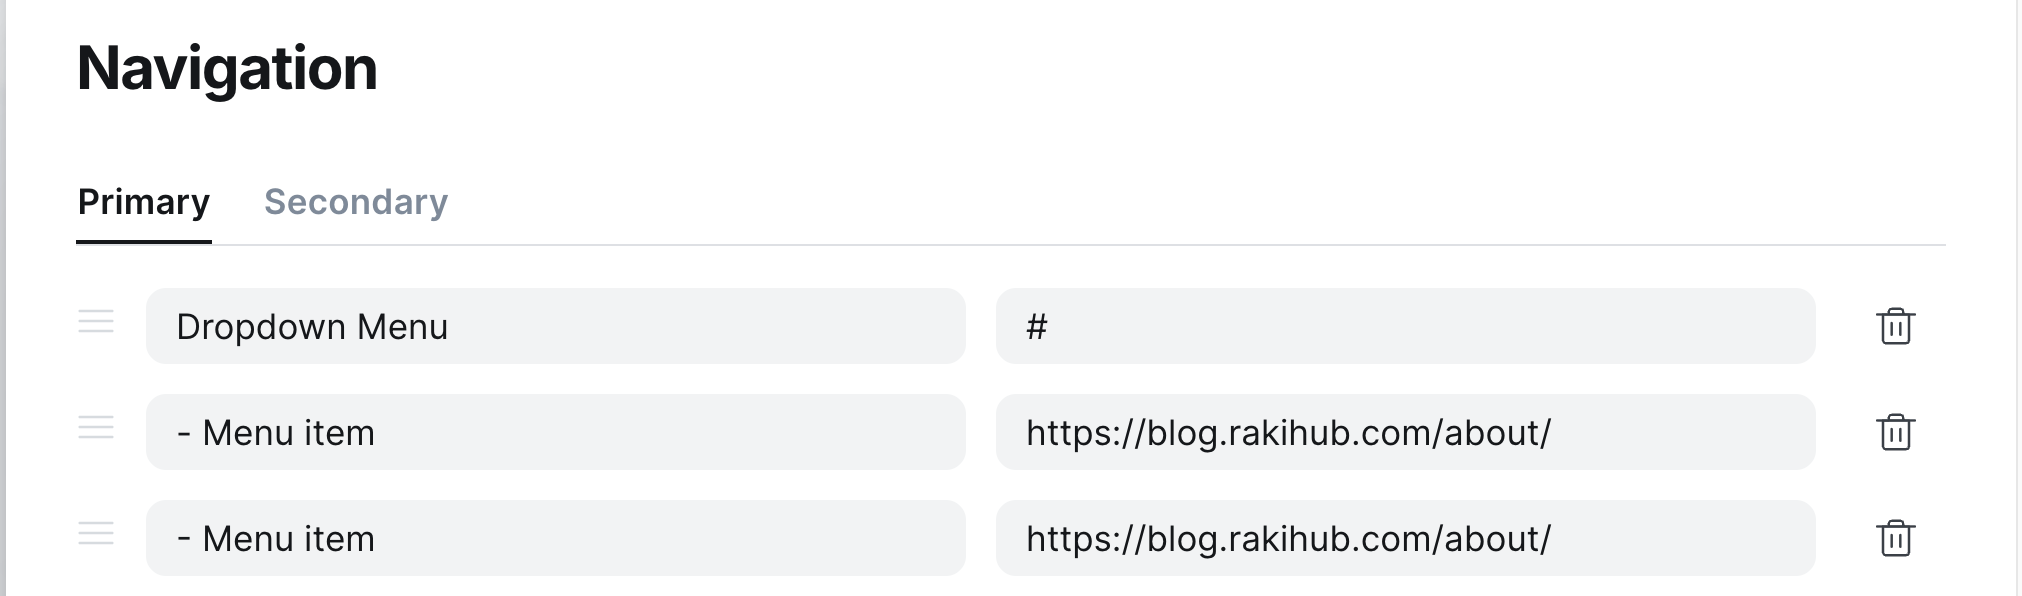
Done! Now you can see the dropdown menu in your Ghost blog.
Please note that the Dropdown Menu Pro works with all official Ghost themes. If you need it for other themes, please contact us at 📮 support@rakihub.com.