Set up an email address with your domain name
Set up an email address that matches your website for free using Cloudflare and Gmail.
Setting up an email address with your domain name can enhance your business image and protect your private email address.
In this tutorial, I will show you how to set up your domain email using Cloudflare and Gmail, step by step.
Note: Your domain must use Cloudflare as its authoritative nameserver to use Cloudflare's email routing feature.
Create the domain email address
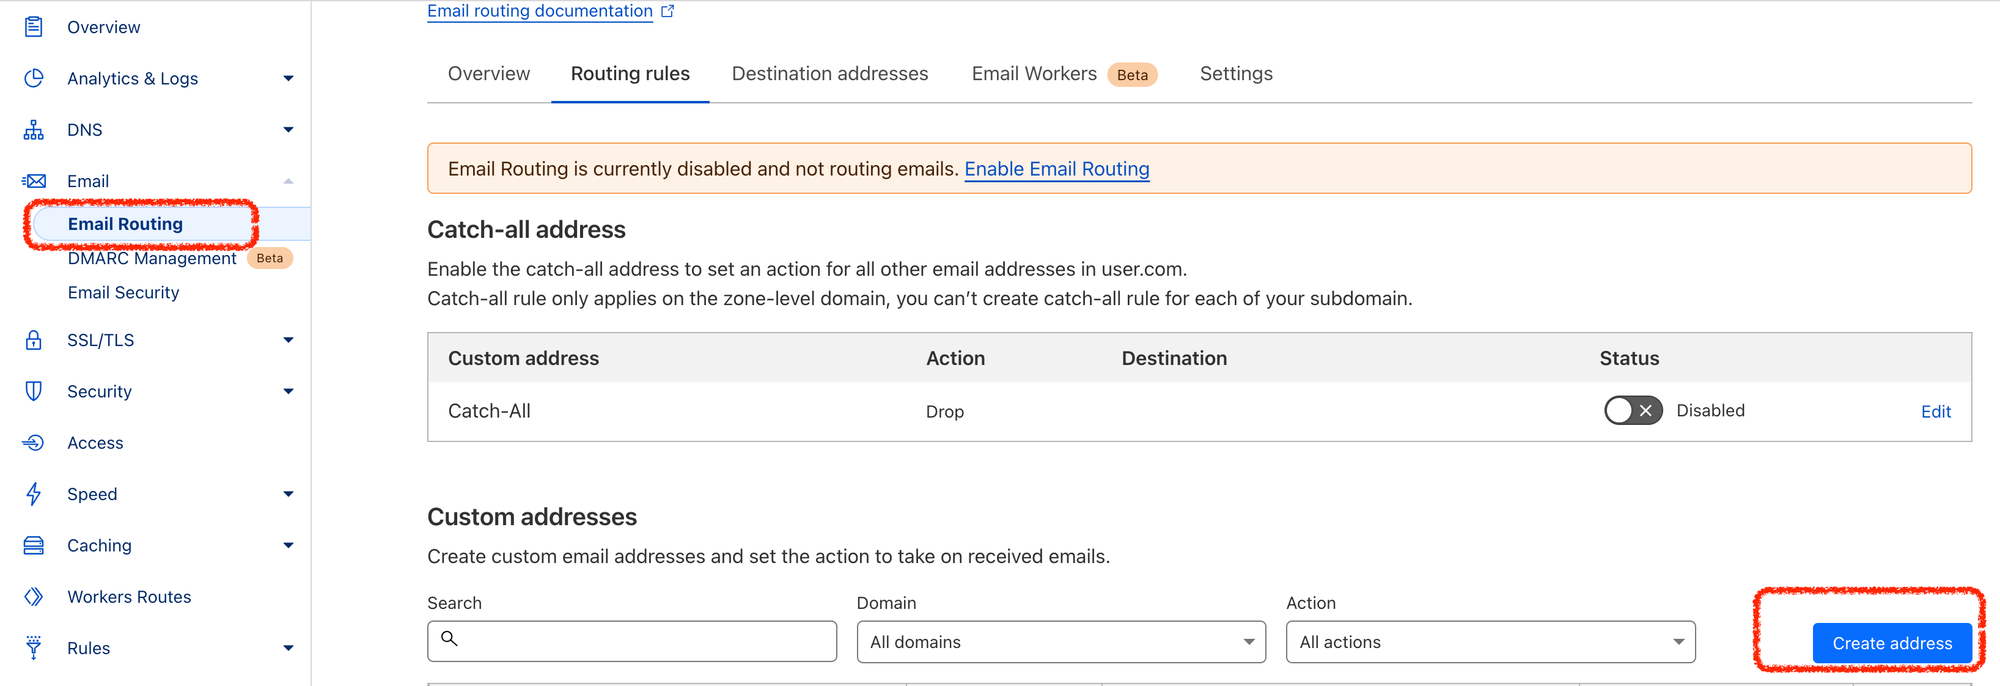
- Navigate to Cloudflare dashboard and select your domain
- Click "Create address" in "Email Routing" to create the domain email
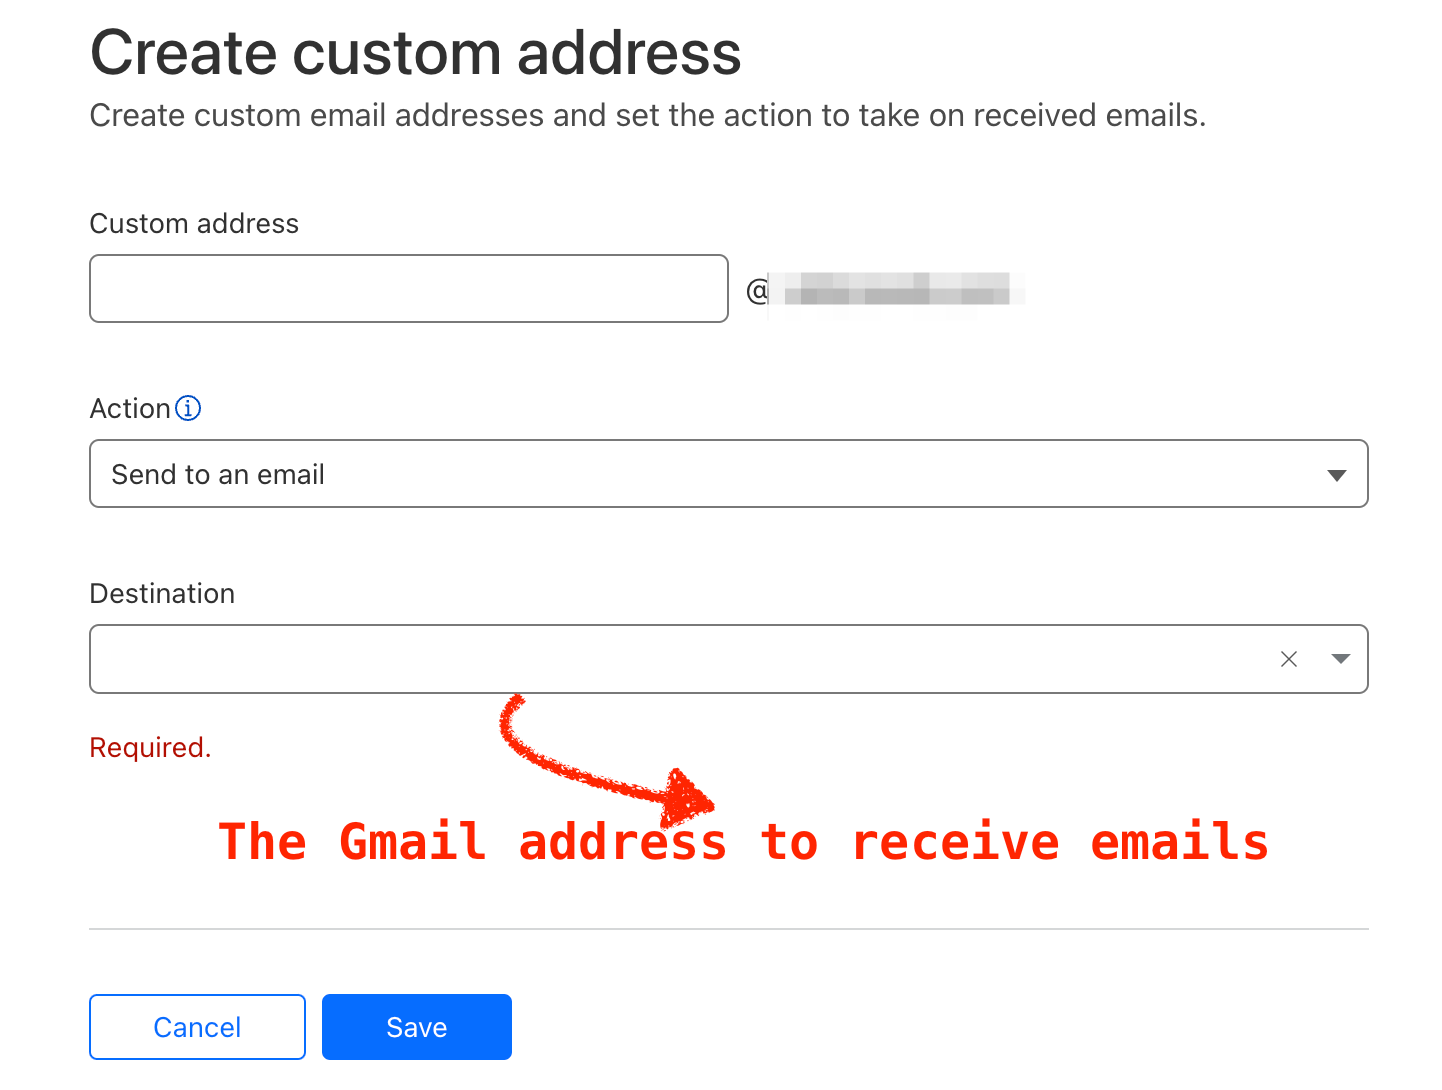
- Enter the email address you want to create and the Gmail address to receive the forwarded emails.
Enable email routing in Cloudflare
- Still in the "Email Routing", click "Settings". You will see the message "Email Routing is currently disabled and not routing emails." and a list of records you need to add to the domain's DNS configurations.
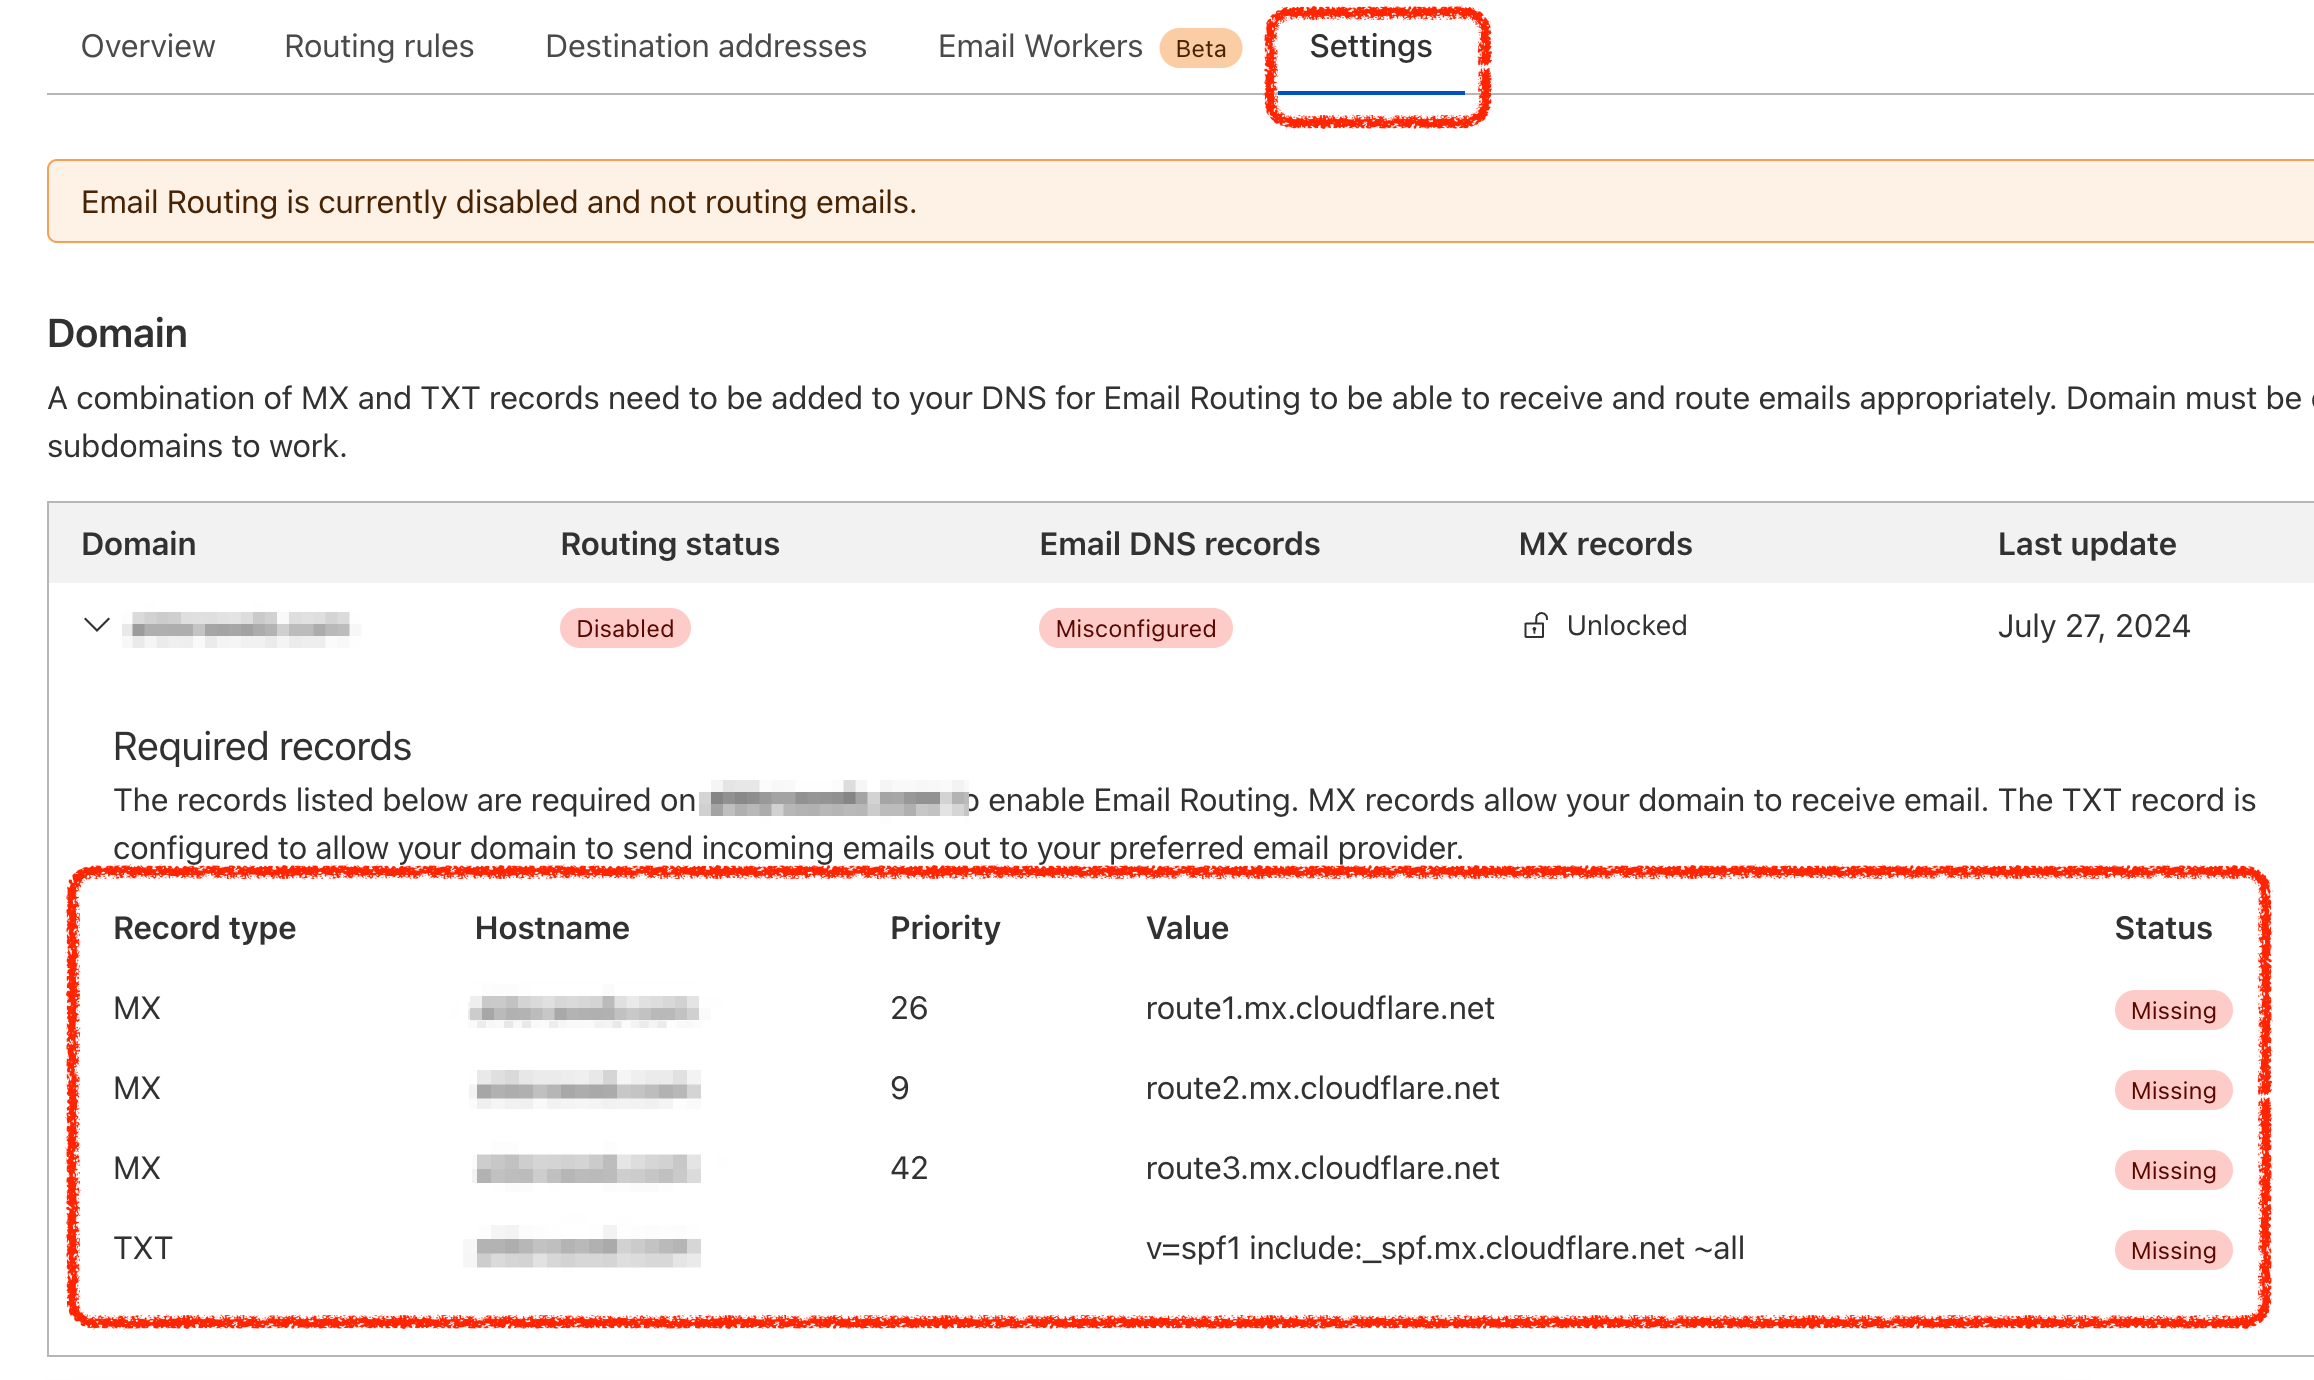
- Go to "DNS" and add the required records to the domain DNS records.

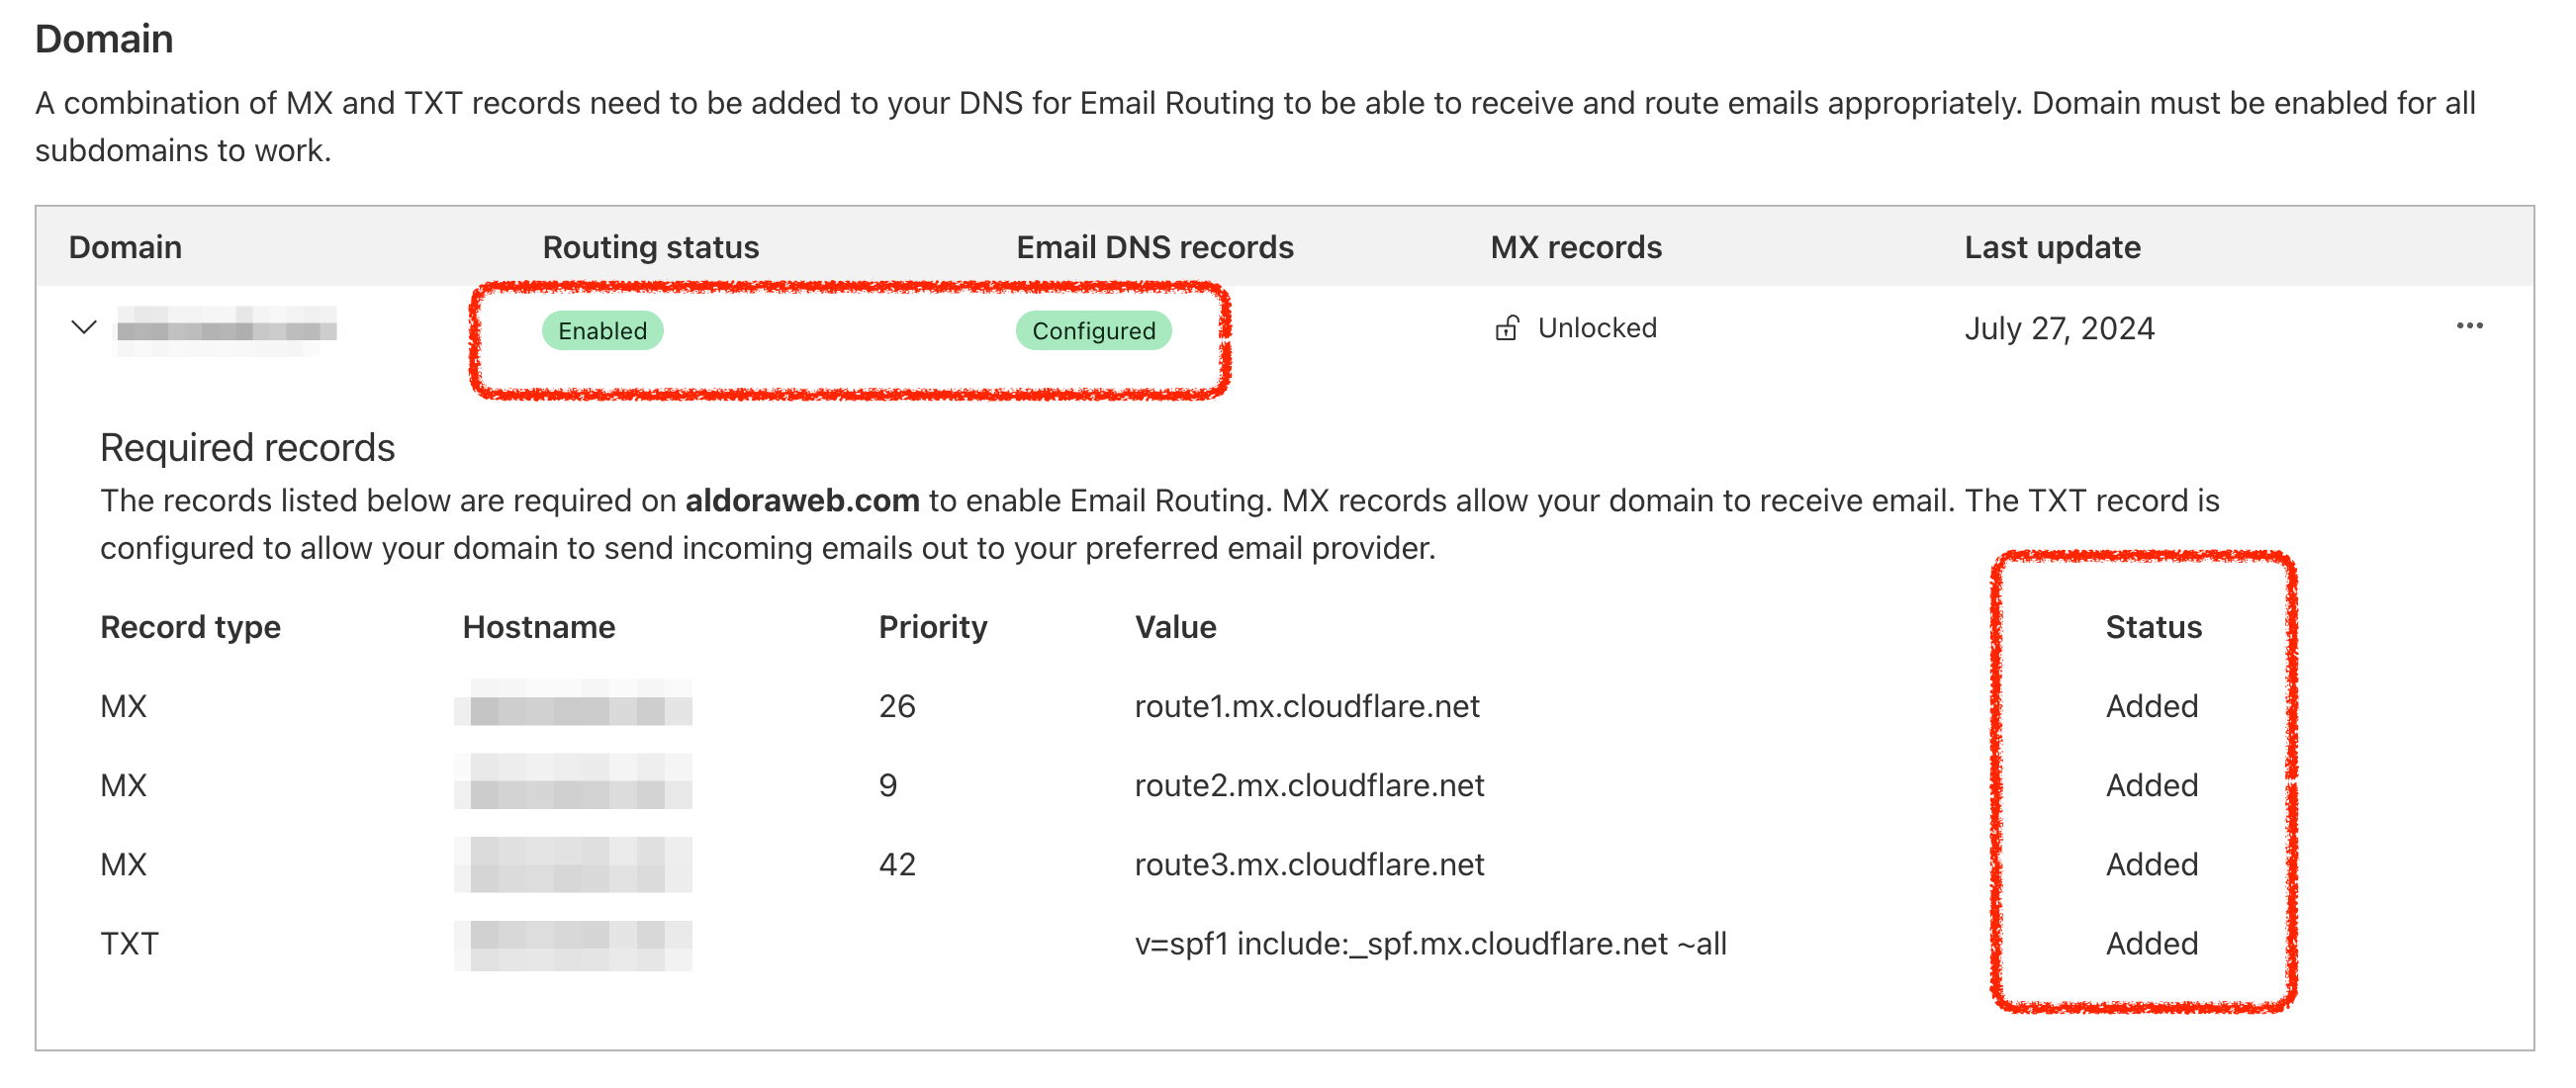
- After adding the DNS records, you should see the "Routing status" turn to "Enabled" in "Settings" of "Email Routing"
Add the domain email to Gmail accounts
- Ensure your Google account has two-factor authentication enabled. If not, you can click this link two-step verification to set it up.
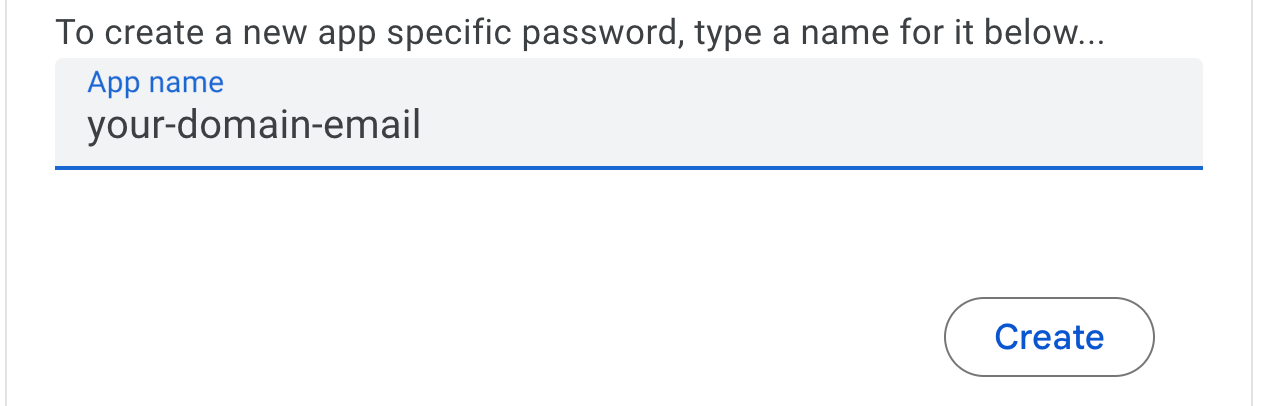
- Create an APP password for mail. Click this link create an app password to create the app password.
- You can use the domain email address as the app name to help you remember its purpose
- After clicking "Create", you will get a password like "abcd efgh hied edae" which will be used in the next step.
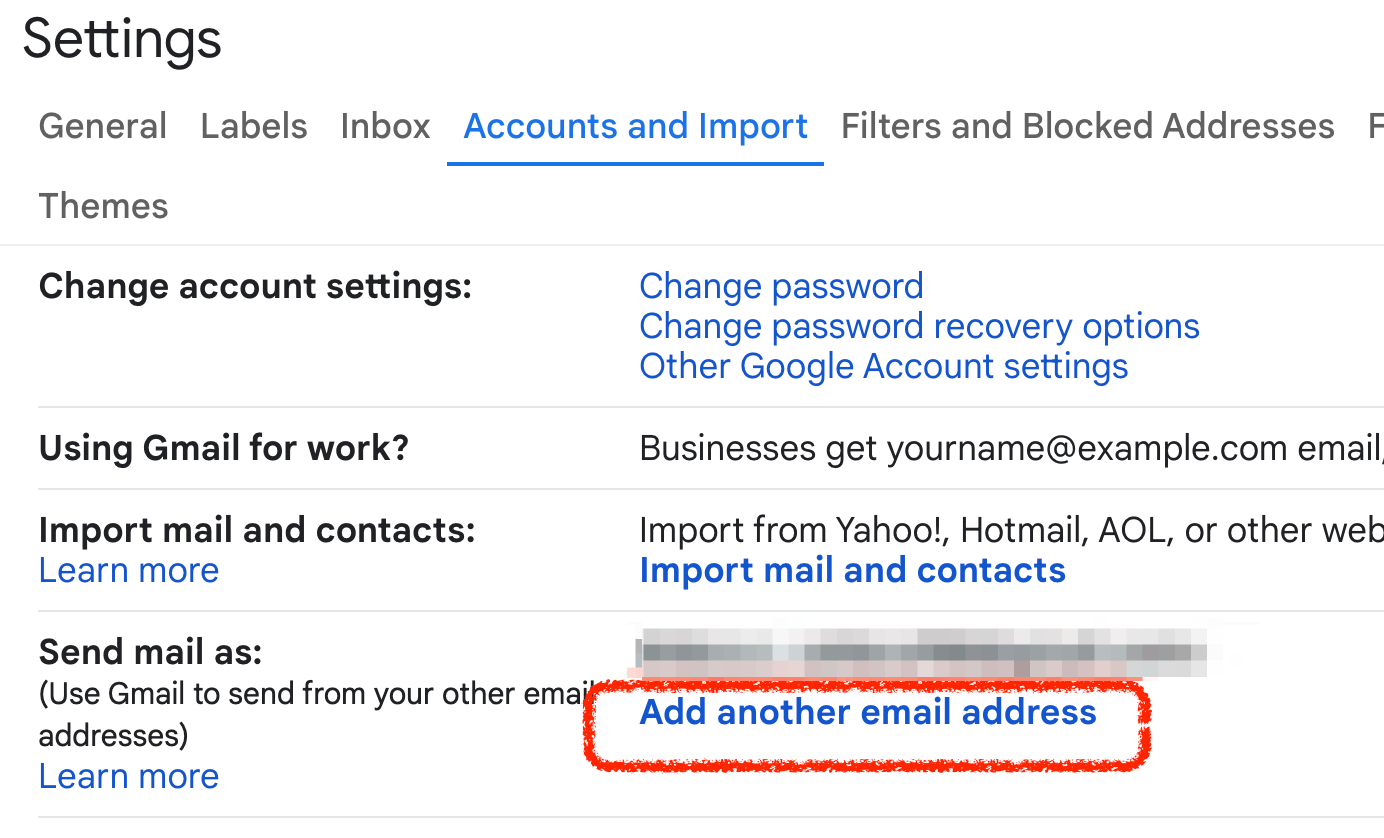
- Add your domain email. In Gmail, navigate to Settings -> See all settings -> Accounts and Import -> Send mail as, click "Add another email address"
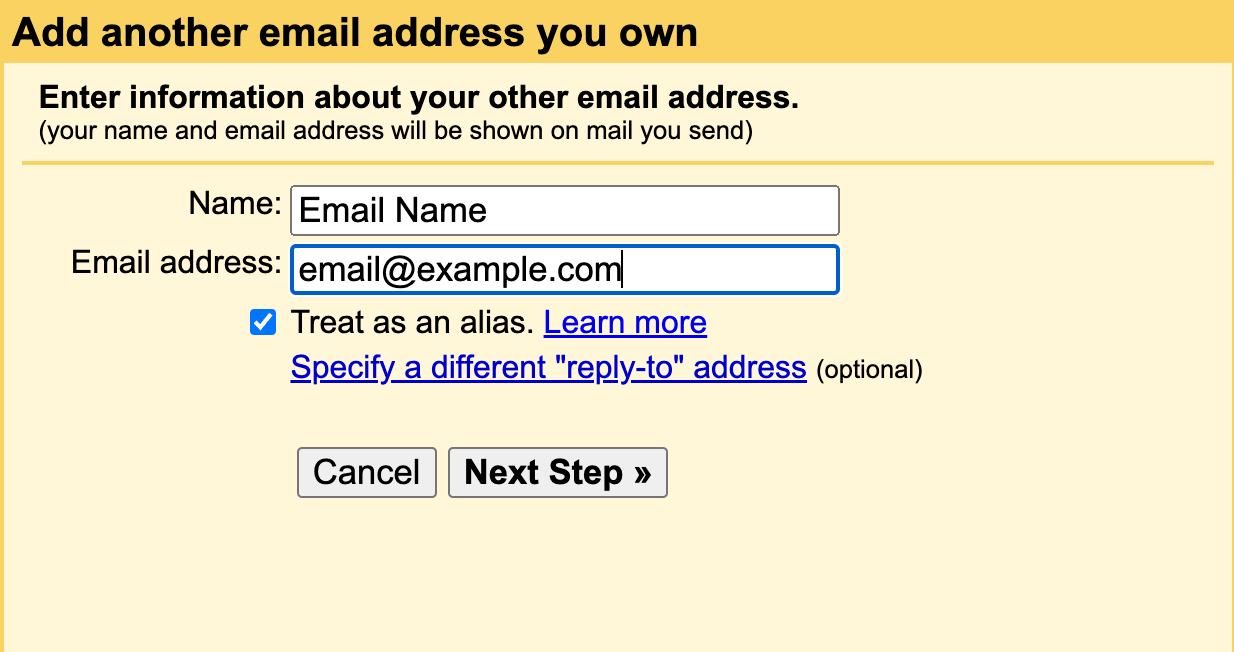
- Fill out the pop-out form
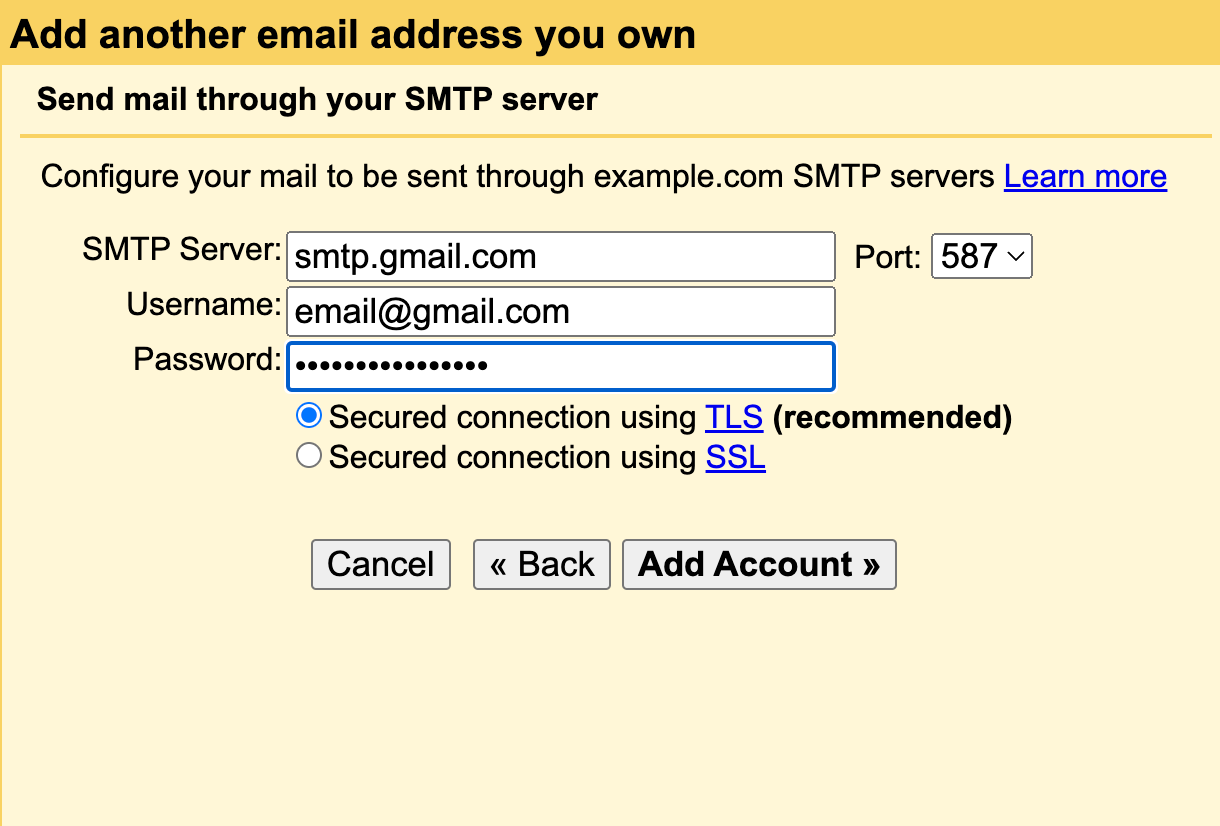
- SMTP Server: smtp.gmail.com
- Port: 587
- Username: Your Gmail address (including @gmail.com)
- Password: The App Password generated in the above step
- Leave TLS enabled
- Click 'Add Account'
Credits
This tutorial references part of the following resources:
Using Gmail SMTP with Cloudflare Email Routing: Step-by-Step Guide